
Last Updated: June 3, 2026
The first time I held a chef’s knife properly, I was twenty-seven. Prior to that, I grasped the handle as one would a hammer and chopped at the onions until they were bruised. My cuts were uneven, slow, and dangerous—the blade wandered because my hand wasn’t in control.
Then a line cook showed me the pinch grip. It felt awkward for ten minutes. By the end of that evening, I was cutting twice as fast with half the effort. The knife stopped fighting me and started working with me.
This guide covers exactly what that cook taught me, plus six years of daily practice. No jargon. Just the grip, the motion, and the cuts that cover 95% of home kitchen work.
Part 1: The Pinch Grip
Most beginners wrap all four fingers around the handle, thumb on top. This feels secure but gives almost no blade control.
The pinch grip:
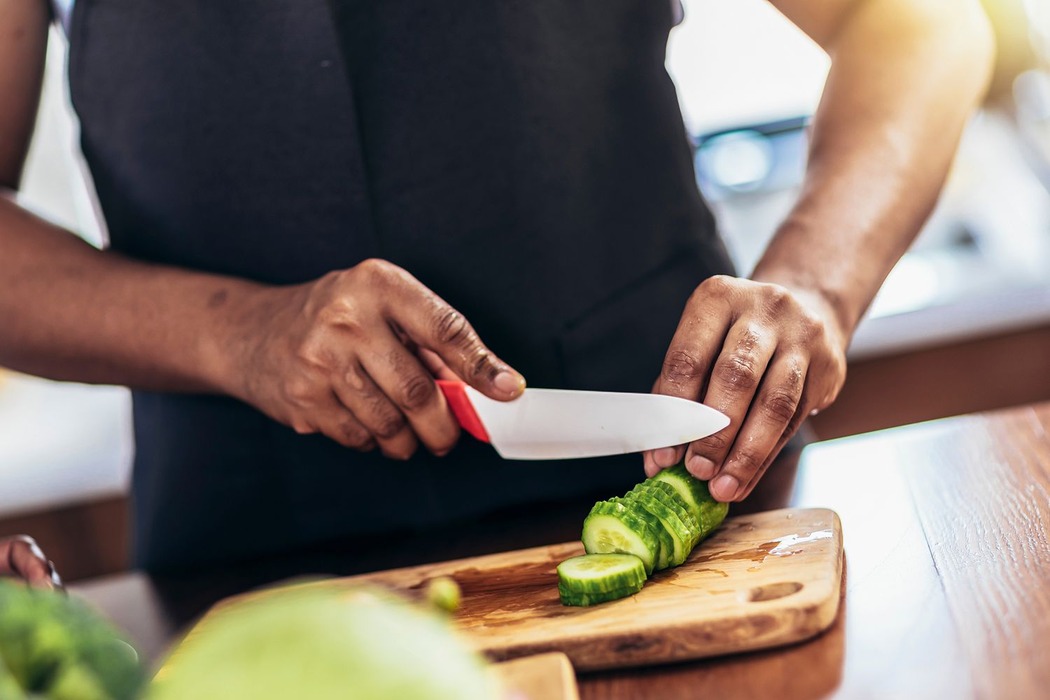
- Pinch the blade between your thumb and the side of your index finger, just above the handle where the blade meets the bolster.
- Wrap your remaining three fingers around the handle loosely.
- Your thumb and index finger do the steering. Your other fingers provide balance, not force.
Why this method works: Your hand sits directly above the blade’s centre of gravity. You guide the cut from the top, not from behind. The knife becomes an extension of your hand.
Part 2: The Claw Hand (Protecting Your Fingers)
Most home-cooking injuries happen here—not from a wild blade, but from fingertips drifting into the cutting path.
The claw hand:
- Tuck your fingertips inward so your fingernails face the blade.
- Use your knuckles as the guide. The flat side of the blade rests against your middle finger’s knuckle as you cut.
- Your thumb and pinky sit behind your fingers, stabilising the food.
- The food moves, not your hand. Slide the food backward with your claw hand as you slice, keeping the knife tip anchored on the board.
Why this works: Your knuckles are bone. Even if the knife slips, it hits the knuckle rather than the fingertip. The blade glides along your knuckle like a train on a track.
Part 3: The Rock Chop (Your Default Motion)
This motion covers 80% of cutting tasks.
- Anchor the knife tip on the cutting board. The tip stays down.
- Lift the handle so the blade rises at an angle.
- Push forward and down in one smooth motion, slicing through the food.
- Return to the start by lifting the handle, with the tip still anchored.
The blade rocks forward and back. Your wrist stays still. Motion comes from your shoulder and elbow.
When to use: Dicing onions, mincing garlic, slicing herbs, cutting vegetables into uniform pieces.
Part 4: The Slice (For Soft Foods)
For tomatoes, cooked meat, or bread.
- Start with the heel of the blade at the top of the food.
- Pull backward while applying gentle downward pressure.
- Let the blade do the work. A sharp knife needs almost no force.
When to use: Tomatoes (so you don’t crush them), slicing roast chicken, portioning fish.
Part 5: The Five Cuts That Cover Everything
1. The Slice
Flat, even pieces, 3–5mm thick. Used for onions, peppers, mushrooms, zucchini, and cooked meat.
2. The Dice
Small, uniform cubes. Large dice (2 cm) for stews, medium (1 cm) for general cooking, and small (5 mm) for salsas. Technique: slice the food into planks, stack the planks, slice the planks into strips, turn the strips, and cut across them into cubes. Uniformity matters more than speed—uneven pieces cook unevenly.
3. The Mince
Very fine pieces are used for garlic, ginger, herbs, and shallots. Rock chop repeatedly through the pile, gathering and re-chopping it.
4. The Julienne
Thin matchsticks, 5 cm long × 3 mm thick. It is used for stir-fries, slaws, and garnishes. Slice into flat planks, stack, then cut into thin strips. Keep stacks small—tall stacks wobble and create uneven strips.
5. The Chiffonade
Thin ribbons of leafy herbs or greens. Stack leaves, roll tightly into a cigar shape, then slice thinly across the roll. Use a sharp knife—dull blades bruise herbs, turning them black at the edges.
Part 6: Keeping Your Knife Sharp
A sharp knife is safer than a dull one. A sharp blade cuts where you aim it. A dull blade slips and skids and requires more force—meaning when it finally goes through, it goes through with momentum you can’t control.
The Paper Test
Hold a sheet of printer paper by one edge. Draw the blade across the top. A sharp knife slices cleanly. A dull knife tears or catches. Test your knife now. If it tears, it needs sharpening.
Honing vs. Sharpening
Honing realigns the microscopic teeth on the blade edge. Do this procedure before every cooking session. Ten seconds. Keeps the edge performing well between sharpenings.
Sharpening removes metal to create a new edge. Do this process every 2-3 months, or when honing no longer restores performance.
For beginners: Start with a pull-through sharpener (foolproof but aggressive). Graduate to a whetstone (1000 grit) when you’re ready.
The Honing Steel
- Hold the steel vertically, tipped on a towel.
- Position the heel of the blade against the steel at an angle of 15 to 20 degrees.
- Draw the blade down and across in one smooth motion, heel to tip.
- Alternate sides. Five strokes per side.
Part 7: Choosing Your First Knife
You don’t need a $300 Japanese blade. You need one reliable knife that feels right.
| Feature | Why It Matters | Avoid |
|---|---|---|
| 8-inch (20cm) blade | Long enough for most tasks, short enough to control | 6-inch (too small) or 10-inch (too unwieldy) |
| Full tang | Metal extends through the handle. Better balance, won’t break | Partial tang or stamped blades |
| High-carbon stainless steel | Holds an edge, resists rust | Pure carbon steel (rusts) or cheap stainless (won’t hold edge) |
| Comfortable handle | You’ll hold this for hours | Slippery or too-small handles |
| Controllable weight | Heavier isn’t better if you fatigue | Too light (no momentum) or too heavy (tires wrist) |
Recommended: Victorinox Fibrox Pro 8-inch (~$45). The handle is comfortable, it holds an edge, and it is nearly indestructible. Mercer Genesis 8-inch (~$40) is a solid heavier alternative.
Part 8: Cutting Board Essentials
Material: Wood or bamboo is gentle on blades and antimicrobial. Plastic is dishwasher-safe but harder on edges. Never use glass, marble, or stone—they destroy edges instantly.
Size: At least 15 × 20 inches (38 × 50cm). The smaller plate causes food to fall off the edges.
Stability: Place a damp towel underneath before cutting. A sliding board is dangerous.
Part 9: Common Beginner Mistakes
| Mistake | The Fix |
|---|---|
| Cutting with a dull knife | Paper test weekly. Hone before every use. Sharpen every 2-3 months. |
| Flat hand on food | Force the claw hand. Tuck fingertips. Use knuckles as a guide. |
| Lifting knife completely | Anchor the tip. Rock the blade. Let the knife work. |
| Rushing | Slow down. Speed comes from repetition, not force. |
| Cutting toward yourself | Turn the food. Always cut away from your body. |
| Not stabilizing round food | Cut a flat side first. Every round vegetable gets a stable base. |
Final Thought
Knife skills aren’t about looking impressive. They’re about making cooking faster, safer, and more enjoyable. When you dice an onion in under a minute without crying (much) or cut a tomato without turning it to pulp for the first time, you will understand why this skill matters.
The investment is small: one decent knife, one excellent board, and about an hour of focused practice. The return is years of smoother, more confident cooking.
Start with the pinch grip. Everything else follows.
Frequently Asked Questions
1. How long does it take to learn basic knife skills?
Most people feel comfortable with the pinch grip and rock chop within a week of daily practice. Consistent, safe dicing takes 2-3 weeks. Speed develops over months, but safety and precision come first.
2. Do I need an expensive knife to start?
No. A $40-60 chef’s knife from Victorinox, Mercer, or Wüsthof’s entry line will outperform a $200 knife in unskilled hands. Learn on something affordable; upgrade when you know what you prefer.
3. What’s the safest way to wash a chef’s knife?
Wash immediately after use, with the blade pointed away from you. Never leave it in a sink of soapy water where you can’t see it. Dry thoroughly. Store it in a knife block, magnetic strip, or blade guard—not loose in a drawer.
4. Can I use a chef’s knife for everything?
Almost. A chef’s knife handles 95% of tasks. Exceptions: bread (serrated knife), delicate peeling (paring knife), and very hard squash (cleaver or heavy chef’s knife with caution).
5. Why does my hand cramp when using the pinch grip?
You’re gripping too tightly. The pinch grip should feel relaxed, almost loose. If your hand cramps, loosen your grip and let the knife’s weight do the work. The blade is sharp—it doesn’t need force.
Sources & References
- McGee, Harold. On Food and Cooking: The Science and Lore of the Kitchen. Scribner, 2004. — Knife mechanics and cutting physics.
- America’s Test Kitchen. “The Best Chef’s Knives.” Cook’s Illustrated, 2023. — Independent testing for knife performance and edge retention.
- National Sanitation Foundation (NSF). “Commercial Food Equipment Standards.” NSF/ANSI 2-2021. — Safety standards for kitchen knives and cutting boards.
- Ward, Chad. An Edge in the Kitchen: The Ultimate Guide to Kitchen Knives. William Morrow, 2008. — Knife selection, sharpening, and technique.
- Victorinox AG. “Fibrox Pro Chef’s Knife Product Specifications.” victorinox.com, 2025. — Blade steel composition and handle materials.
- Mercer Tool Corp. “Genesis Forged Chef’s Knife Technical Data.” mercerculinary.com, 2025. — Full tang construction and NSF certification.
- USDA Food Safety and Inspection Service. “Cutting Boards and Food Safety.” fsis.usda.gov, 2024. — Cutting board materials and cross-contamination prevention.