
⏱ Reading time: 8 minutes
I spent years buying canned beans because dried beans seemed like too much work. Soaking overnight. Hours of simmering. Uncertainty about whether they would ever soften. The convenience of popping a can open wins every time. Then I tasted properly cooked dried beans, and the game changed entirely.
Dried beans cooked from scratch have a creamy texture and deep flavour that canned beans cannot touch. The broth they create is rich and silky, perfect for soups and stews. They cost a fraction of the price. And once you understand the process, the hands-on time is minimal. The pot does the work while you live your life.
This guide covers everything you need to know. No myths. No unnecessary steps. Just the simplest path from a bag of dried beans to a pot of creamy, flavourful perfection.
Why Bother With Dried Beans?
Canned beans are convenient, but they come with trade-offs. They are often oversalted and packed in a thin, starchy liquid. Their texture is uniform and slightly mushy. Dried beans, cooked properly, offer something else entirely.
The texture is creamier. The flavour is deeper and more complex. The cooking liquid, called pot liquor, is a flavourful broth you can use in soups, rice, and sauces. Dried beans are also dramatically cheaper. A pound of dried black beans costs about two dollars and yields the equivalent of four to five cans. If you eat beans regularly, the savings add up fast.
There is also the matter of sodium control. Canned beans can contain up to four hundred milligrams of sodium per half-cup serving. When you cook dried beans, you control the salt entirely. This matters if you are watching your intake.
Sorting and Rinsing: The Two-Minute Prep
Before cooking, spread your dried beans on a baking sheet or clean counter and pick through them. Look for small stones, shrivelled beans, or anything that does not belong. This is rare with quality brands, but it takes two minutes and saves you from an unpleasant surprise.
Rinse the sorted beans under cold water in a colander. This removes dust and surface debris. Do not skip this step. Beans travel a long way from field to bag, and they are not washed before packaging.
To Soak or Not to Soak?
This is the most debated topic in bean cookery. Some cooks insist on overnight soaking. Others claim it is unnecessary. The truth is more nuanced.
Soaking does two things. It reduces cooking time by roughly thirty per cent. It also helps the beans cook more evenly, with fewer split skins and blowouts. If you have time, soak. If you do not, you can still cook unsoaked beans successfully.
For a quick soak, cover the beans with water, bring to a boil for two minutes, then remove from the heat and let sit for one hour. Drain and cook. This achieves most of the benefits of overnight soaking in a fraction of the time.
The Salt Soaking Myth: Old cookbooks warn against salting soaking water, claiming it toughens the skins. This has been debunked. In fact, salting the soak water helps season the beans throughout and can improve texture. Use one tablespoon of salt per quart of soaking water. The beans absorb only a small amount, but the difference in flavour is noticeable.
The Cooking Process: Low and Slow
Place your soaked or unsoaked beans in a heavy pot. Cover with fresh water by about two inches. Bring to a gentle boil, then reduce to a bare simmer. Cover partially and cook until tender.
The key word is gentle. A violent boil bounces the beans around, rupturing skins and creating mush. A slow simmer keeps the beans intact while the starches inside gradually soften. You want lazy bubbles, not a rolling boil.
How long? It depends on the bean, the age of the bean, and whether you soaked it. Here is a practical guide.
| Bean Type | Soaked Time | Unsoaked Time | Best Uses |
|---|---|---|---|
| Black Beans | 1 to 1.5 hours | 1.5 to 2 hours | Cuban dishes, soups, rice and beans |
| Pinto Beans | 1 to 1.5 hours | 1.5 to 2 hours | Refried beans, chili, burritos |
| Navy Beans | 45 min to 1 hour | 1 to 1.5 hours | Baked beans, Senate bean soup |
| Chickpeas | 1.5 to 2 hours | 2 to 2.5 hours | Hummus, falafel, stews, salads |
| Kidney Beans | 1 to 1.5 hours | 1.5 to 2 hours | Chili, red beans and rice |
| Cannellini Beans | 45 min to 1 hour | 1 to 1.5 hours | Italian soups, pasta e fagioli |
| Lentils (Green/Brown) | Not needed | 20 to 30 minutes | Soups, salads, Indian dal |
| Red Lentils | Not needed | 15 to 20 minutes | Dal, soups (break down easily) |
These times are estimates. The age of your beans matters enormously. Dried beans from a bulk bin that have been sitting for two years will take significantly longer than beans from a freshly sealed bag. There is no way to know the age, so start checking early and be patient.
When to Add Salt and Acid
Here is another myth to dispel. You absolutely can salt beans during cooking. In fact, you should. Salt was added early in the season to the beans throughout. Salt added at the end only seasons the surface. The key is moderation. Add one teaspoon of salt per pound of dried beans at the beginning of cooking, then adjust to taste at the end.
Acid is different. Tomatoes, vinegar, wine, and citrus prevent beans from softening properly. The acid binds with the bean starches and creates a tough exterior. If you are making a tomato-based bean dish, cook the beans until nearly tender in plain water, then add the acidic ingredients for the final twenty to thirty minutes.
The Baking Soda Shortcut: A quarter teaspoon of baking soda per pound of beans can speed softening, especially in hard water. It raises the pH and helps break down pectin in the bean skins. Use sparingly — too much makes the beans mushy and gives them a soapy flavour. This is especially helpful for older beans that refuse to soften.
How to Know When Beans Are Done
Doneness is personal. Some people like beans with a slight bite. Others want them completely creamy. The standard test is simple: blow on a bean. If the skin splits and peels back, it is tender. You can also pinch one between your fingers. It should give easily.
Taste is the final judge. A properly cooked bean should be creamy inside, not chalky or grainy. The skin should be intact but not tough. If you are using the beans in a dish that will cook further — like baked beans or chilli — stop when they are slightly underdone. They will finish in the oven.
Using the Bean Broth
Do not pour the cooking liquid down the drain. It is called pot liquor, and it is liquid gold. It contains starch from the beans, which gives body to soups and sauces. It is seasoned from the beans themselves. It has more flavour than most store-bought broths.
Strain the beans and reserve the liquid. Use it as the base for soup. Cook rice in it. Thin a thick stew with it. Freeze it in ice cube trays for quick additions to future dishes. Once you start using bean broth, you will never go back to water.
Storing and Freezing Cooked Beans
Cooked beans keep in the refrigerator for four to five days. Store them in their cooking liquid to prevent drying out. The liquid also continues to season them.
For longer storage, freeze beans in portioned containers or freezer bags. Cover them with some of their cooking liquid to protect against freezer burn. They keep for six months. Thaw overnight in the refrigerator or quickly in the microwave. The texture remains excellent.
Having cooked beans in the freezer changes weeknight cooking. You can make hummus in ten minutes. Throw together a quick soup. Add protein to a salad. Having a stash ready means you get all the benefits of dried beans without the wait.
| Storage Method | Duration | Best Practice |
|---|---|---|
| Refrigerator | 4 to 5 days | Store submerged in cooking liquid |
| Freezer (containers) | Up to 6 months | Leave 1 inch headspace; cover with liquid |
| Freezer (bags) | Up to 6 months | Lay flat to freeze; stack when solid |
The Pressure Cooker Shortcut
If you own an Instant Pot or pressure cooker, dried beans become a weeknight possibility. No soaking required. The pressure forces water into the beans rapidly, cutting cook time to twenty to forty minutes depending on the variety.
Add one pound of rinsed beans, six cups of water, and one teaspoon of salt. Pressure cook on high: twenty-five minutes for black beans, thirty for chickpeas, and twenty for navy beans. Natural release for fifteen minutes, then quick release any remaining pressure.
The texture is slightly different from stovetop beans — a bit softer, with more blown skins. For dishes where texture matters, like bean salads, stovetop is still better. For soups, stews, and refried beans, pressure cooking is a game changer.
Final Thoughts
Cooking dried beans is not complicated. It requires planning, not skill. Sort, rinse, and soak if you have time; simmer gently until tender; season thoughtfully. The pot does the heavy lifting.
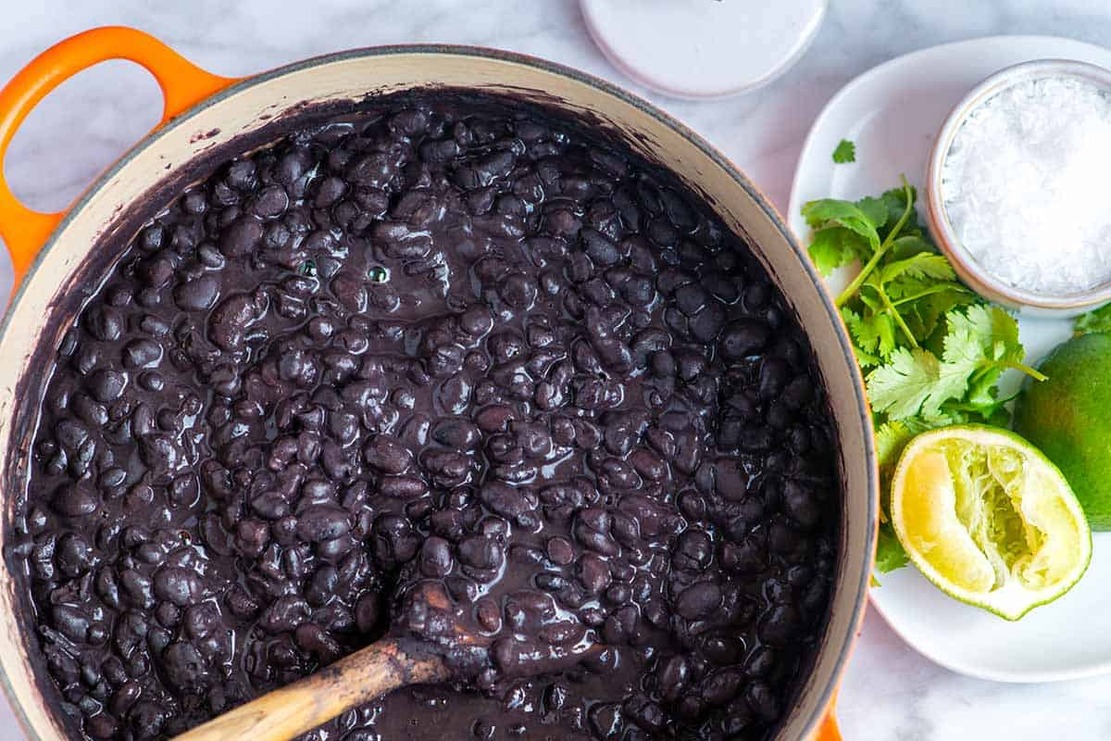
The reward is beans that taste like beans should. Creamy, flavourful, and deeply satisfying. A pot of freshly cooked black beans with nothing but salt and a drizzle of olive oil is a legitimate meal. Add rice and you have dinner. Add broth and vegetables and you have soup. The possibilities are endless, and they all start with a bag of dried beans and a little patience.